iNEXIV video measuring system accelerates PCB inspection
A Nikon iNEXIV video measuring machine has successfully taken over quality control of printed circuit boards (PCBs) at Stevenage Circuits Limited (SCL) after the graphics card failed in a piece of similar, decade-old equipment from another supplier.
22-05-2017
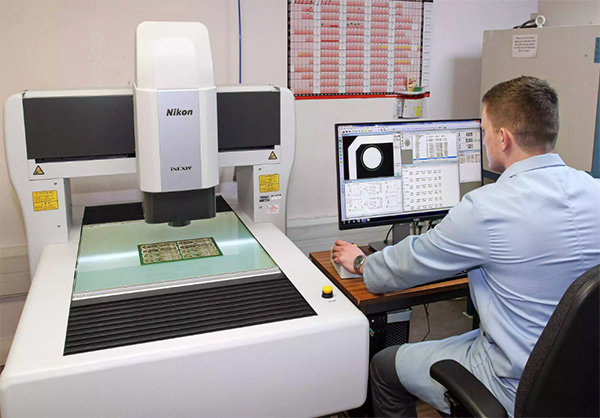
A Nikon iNEXIV video measuring machine has successfully taken over quality control of printed circuit boards (PCBs) at Stevenage Circuits Limited (SCL) after the graphics card failed in a piece of similar, decade-old equipment from another supplier. The new iNEXIV VMA4540 is used virtually continuously for 2-D optical coordinate measurement of machined features and copper tracks. It underpins not only first article inspection of boards and printed reports for customers, but also process control in the drilling, etching and routing departments.
 James Pickett, Quality Engineer, Stevenage Circuits Limited, operating the Nikon Metrology iNEXIV VMA4540 video measuring machine.
Alternatives to a replacement video measuring machine were evaluated, such as table-top varieties of measuring cameras and coordinate measuring machines. Even the possibility of subcontracting first article inspection to an external bureau was considered. However, it was decided that established in-house procedures would remain, so Robert Brown, owner and Managing Director of SCL and James Pickett, Quality Engineer, set about sourcing the best equipment for their requirements, productivity and affordability being key.
Three potential suppliers were identified, but Nikon Metrology was always the front runner. Mr Pickett said, “Technical support was there from day one, from the enquiry right through to installation and commissioning of the video measuring machine in January 2017.
“Moreover, the machine was around half the price of the other main contender, so it was very affordable and return on investment will be rapid.
“We were also influenced by Nikon’s name as a manufacturer of top quality cameras and optics. The iNEXIV was best in class and the clarity of the optics was second to none. You could tell the difference between their equipment and a competitor’s during trials we carried out at both companies.
“Another positive factor was the VMA4540’s adaptable software. In addition, the support from Nikon Metrology’s UK team was deemed to be the best fit, as the company had a demo centre and a large team that was very knowledgeable about the system.”
Established in 1971, SCL is the only European manufacturer with in-house capability for design and production of all four principal types of PCB. The single- and multi-layer boards are manufactured to a minimum standard of IPC class 2 and are supplied in high volume, small batch or prototype quantities to PCBA (assembly) houses, where electronic components are mounted. Heat sinks are the only additions to the boards before they leave the Stevenage factory, bound for customers in over 40 countries. Radio frequency boards account for a majority of output and around one-third of total production is destined for the medical industry, while the space and military sectors are also regularly supplied.
Rapid PCB turnaround
Close-up of the Nikon Metrology iNEXIV control screen running AutoMeasure software.The manufacturer prides itself on the supply of PCBs in short lead times, three to five days turnaround being the norm from order to delivery. Around half a dozen new jobs are progressed through the factory on a typical day, with up to 15 boards requiring in-process checking.
The company’s quality control department is therefore kept busy from 7.00 am until 7.00 pm, five days a week and sometimes on Saturdays. It means that the Nikon video measuring machine is required to work almost non-stop and is used not only by Mr Pickett, who programs the machine, but also by machine operators in the various production departments.
The VMA4540 is called upon repeatedly during the life cycle of each new job. As 95 per cent of SCL products only need positional and dimensional measurement of profiles, such as board periphery, cutouts and drilled holes as well as copper tracks and pads, the machine is used exclusively in 2-D mode. Its ability to accept a laser or touch probe is not needed and neither is its 3-D measuring capability derived from repeated focusing down sloping features.
Reliability of first article inspection at each stage of a board’s manufacture is crucial, as the results are used to control each process. Inaccurate or inconclusive readings would negatively impact production.
Repeated visits to the VMA4540
After the required number of layers has been bonded together to form a board, the first operation is CNC drilling using data sent from SCL’s CADCAM department, which takes into account stretching or shrinkage during subsequent stages of manufacture. The first-off from each batch of typically 25 is checked at this stage on the video measuring machine against the corresponding Gerber file, a vector format for 2D images used as standard in PCB industry software. Alternatively, if there is time, Mr Pickett converts the data to DXF, as it is easier to manage. The Nikon Metrology iNEXIV control can import both file formats and work with them natively.
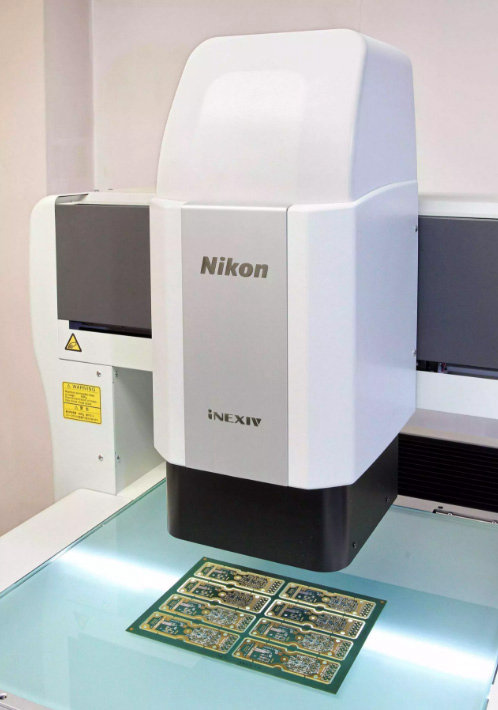
A panel of eight PCBs being inspected on the VMA4540 in a single CNC cycle.If any discrepancy is found, for example a hole is not present due to a broken drill, the measuring machine stops and flags up an error. An out-of-tolerance hole diameter or position, which typically need to be within ± 50 μm and ± 100 μm respectively, results in a similar error message. Normally, the PCB passes the inspection and a system report is prepared, although not normally printed out as it is rarely required by the customer. The historical data can however be interrogated for troubleshooting purposes if a problem subsequently occurs with the board. The next stage of production is etching of the tracks using laser direct imaging. Track widths are important, especially on radio frequency boards, and have to be typically within 50 μm to 100 μm, ± 10 μm. A sample scan is made on the VMA4540 across an area of the first-off and compared with the CADCAM data to ensure that track measurements including their positions are within tolerance.
After visits to the solder resist and plating departments, the PCBs find their way to the routing shop where CNC machines trim the boards to their final size and produce internal cutouts as stipulated in the CAD drawing. Again, the first-of is checked on the VMA4540 against the Gerber / DXF file. The finished product is now inspected in its entirety and it is this dimensioned, first article inspection report that SCL’s customers normally require. Results are entered automatically by the Nikon Metrology software into a test report template that populates an Excel spreadsheet. It is linked to the relevant CAD drawing and given to the customer, as well as being archived for future reference.
Between 10 and 20 per cent of final boards are evaluated in this way on the video measuring machine. In the case of smaller PCBs, up to a dozen or more can be on the table at the same time and the software steps and repeats to check the entire panel in a single cycle, very rapidly.
Mr Pickett concluded, “We have been delighted with the performance of the Nikon machine, which is spot-on in its measuring capability, particularly when inspecting smaller features that our other equipment could not do in a similar time frame.”


